$30 Entryway Photo Collage
This post may contain affiliate links. Read our disclosure policy.
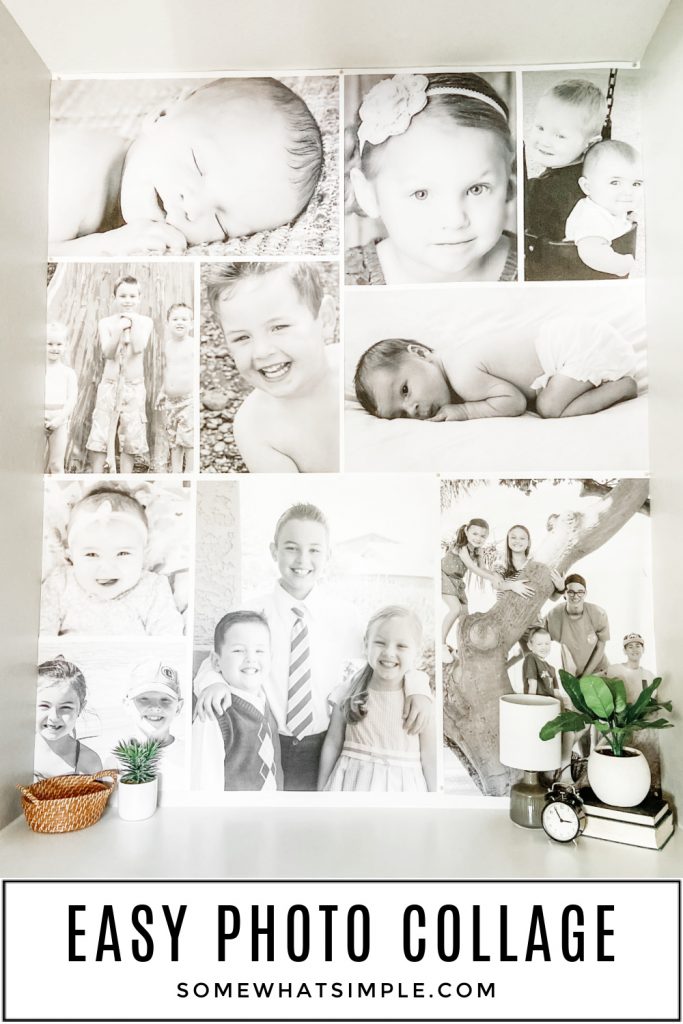
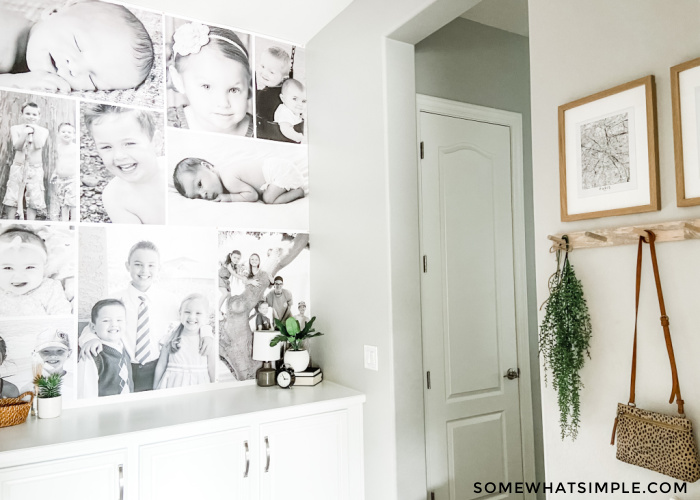
Our mudroom gets a much-needed facelift with a show-stopping Photo Collage that fills an entire wall for only $30! (Bonus: It’s also SUPER EASY to create!)
Here are a few more ways to decorate the walls in your home – Entry Way Photo Collage, How to Decorate a Blank Wall, and How to Hang a Picture Perfectly Straight.
I had a such good time finishing my mudroom last month! Thanks for all the love and kind comments. Now it’s time to answer the questions I’ve been getting about the AMAZING photo collage I put up in this space! Let’s get right to it!
$30 Photo Collage
Q: How big is that wall?
A: It’s BIG.
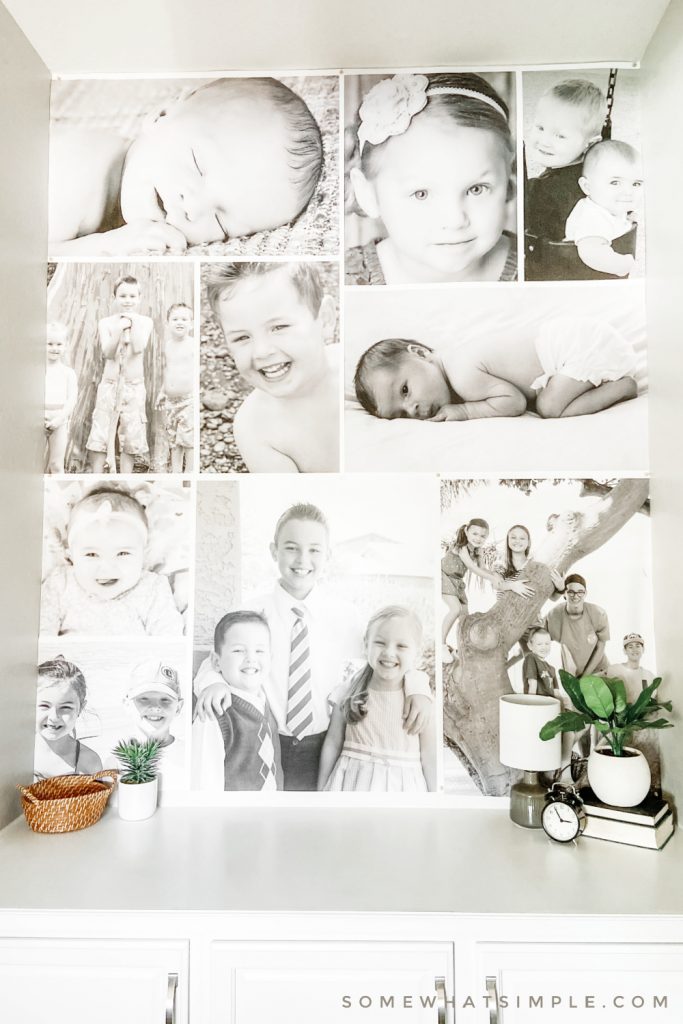
It is 84″ tall and 69″ wide. I can stand on the counter and not touch the ceiling.
Q: Was the entire wall really only $30?
A: YES!!!
In all transparency, I originally planned to do this wall in canvas prints. An online canvas company reached out and asked if I would work with them, so I pitched the collage idea, designed all the canvas sizes on their site, and went to place my order that they were going to cover for free. But the total cost to do this wall in large canvas prints was over $700!!!
Since not all of my readers have a chance to work with a sponsor, this partnership didn’t seem very genuine. I couldn’t expect anyone to replicate something that I would never be able to afford. So I parted ways with the sponsor and went back to the drawing board. I had used Engineer Prints in my decor before, so I decided to give it a shot for this space. Needless to say, that decision turned out BEAUTIFULLY!
COST BREAKDOWN – Engineer prints at FedEx Office are less than $10 each, depending on the size you order. I created 4 prints for this space (I know it looks like more than 4 images, but there are actually several images to one print) and my order total was just under $40. I found an online coupon for 25% off, which brought my grand total to less than $30!
Q: What is an Engineer Print?
A: It’s your new best friend.
An Engineer or Architectural Print is a lower-quality image that is printed on large sheets of thin paper. (Think about the blueprints that architects roll out on a big table.)
FedEx Office allows you to upload any image, graphic, or design and print it out on Engineer paper. You can choose to print it in color (which is a lot pricier) or black and white. Black and white engineer prints at FedEx Office start at just a couple of bucks apiece.
Q: Do you have any tips before I create my own? Anything I should keep in mind?
A: Yep.
- Unless you plan to print pictures from the same photo session, matching colors and hues and tones can be nearly impossible. Black and white prints are not only cheaper to buy, but they look more uniform.
- For a big collage like this, I found that close-up pictures of faces are the way to go! Look at the pictures on my wall – which ones grab your attention first? Not the one in the lower right corner of my 5 kids climbing a tree, right? Crop your images to take out all the distractions and zoom in on those eyes, and cheeks, and lips so that every picture will be its own show-stopper!
Q: How did you make the photo collage?
A: Let me walk you through the entire (EASY!) process!
Here’s a video I made of the install process. Written directions below.
How to Make a Photo Collage
SUPPLIES –
- engineer prints
- thumb tacks – I used white so they blend in with the white borders around my pictures.
- razor blade – use it to trim any images to fit your wall, as needed.
- poster putty, optional
DIRECTIONS –
To Make Your Prints…
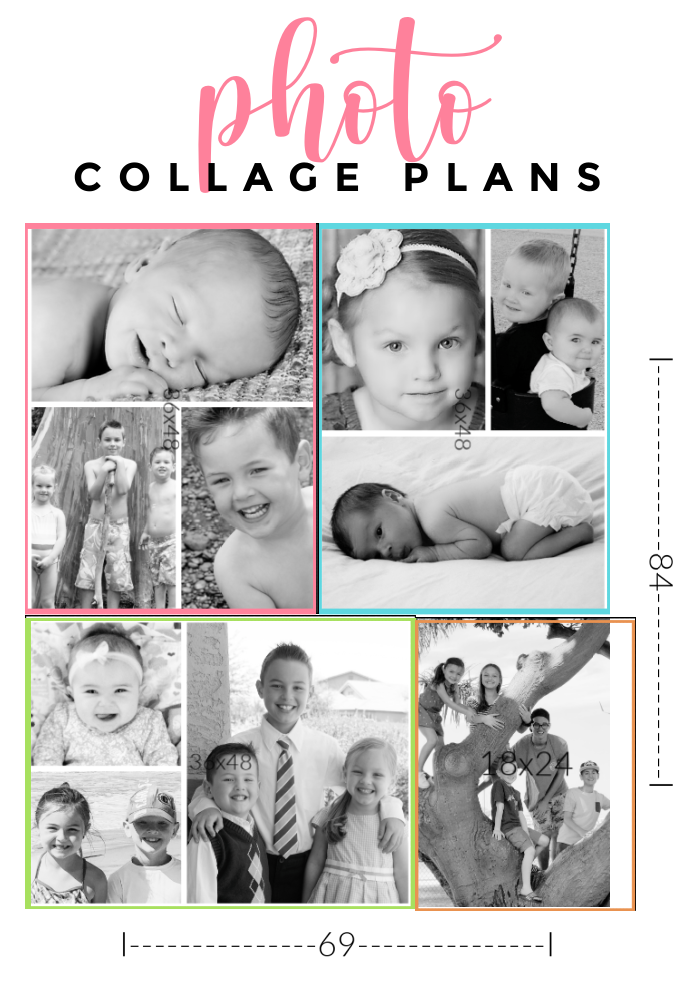
- Measure your wall + plan your print sizing. Once you figure out how big your space is, go to FedEx office and look at the different Architectural Print Sizes. I found that to fill my entire wall, I could order 3 – 36×48 images and 1- 24×36 image and it would fit my wall almost perfectly!
- Pick your images. Once I decided I would order 4 prints, it was time to select the images I would use. I knew wanted more than just 4 images, though, so I decided to grab a bunch that I loved and make 3 collages with 3 images each for my 36×48 prints, and one picture to take up the whole 24×36 print. This means I needed 10 images total.
- Edit your images. I uploaded each image to PicMonkey.com and cropped them, as needed, and made them all black and white.
- Make your collages. If you’re trying to get more images on each print as I did, PicMonkey has a collage tool that makes it super easy on you! You can set your print size, drag and drop however many pictures you want to use, and set the color + thickness of your border. I went with a thick white border between each image and I love the definition it gives to my collage.
- Upload your prints to FedEx Office. I used to get my Engineer prints from Staples and Office Max, but they no longer offer this service anymore. I’m hoping FedEx Office keeps this option available because I actually love their printing services more than the other companies I’ve tried. (BONUS: they always seem to have coupons for print orders too! If you don’t see an applicable coupon code right on their site, check RetailMeNot.com.)
- Place Your Order. You can choose to pick up or have it delivered for an additional cost. My pick up orders are always done within a couple of hours!
… and that’s it! With your prints in-hand, you’re ready to install!
To Install Your Collage…
- Secure your prints to your wall with thumbtacks in each corner, and along the borders of your images every several inches. If you don’t want to put a billion holes in your walls, use the thumbtacks in each corner and then try poster putty along the borders.
- Trim any overhang or excess paper with your razor blade.
…and that’s it!
Let me know if you have any other questions in the comment section below!