Ruffle Wreath
This post may contain affiliate links. Read our disclosure policy.
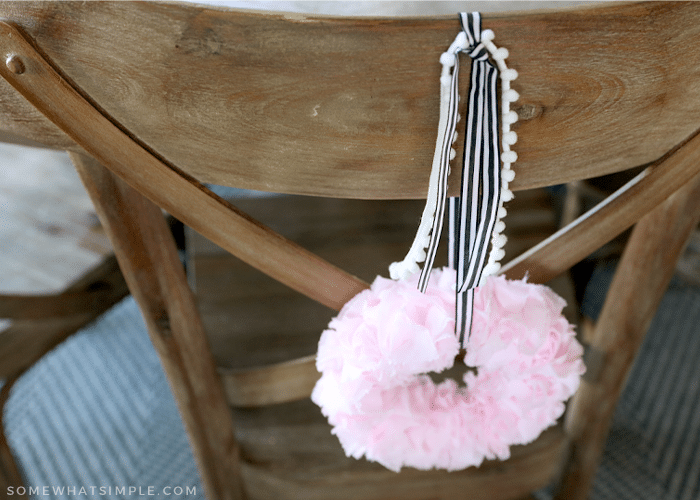
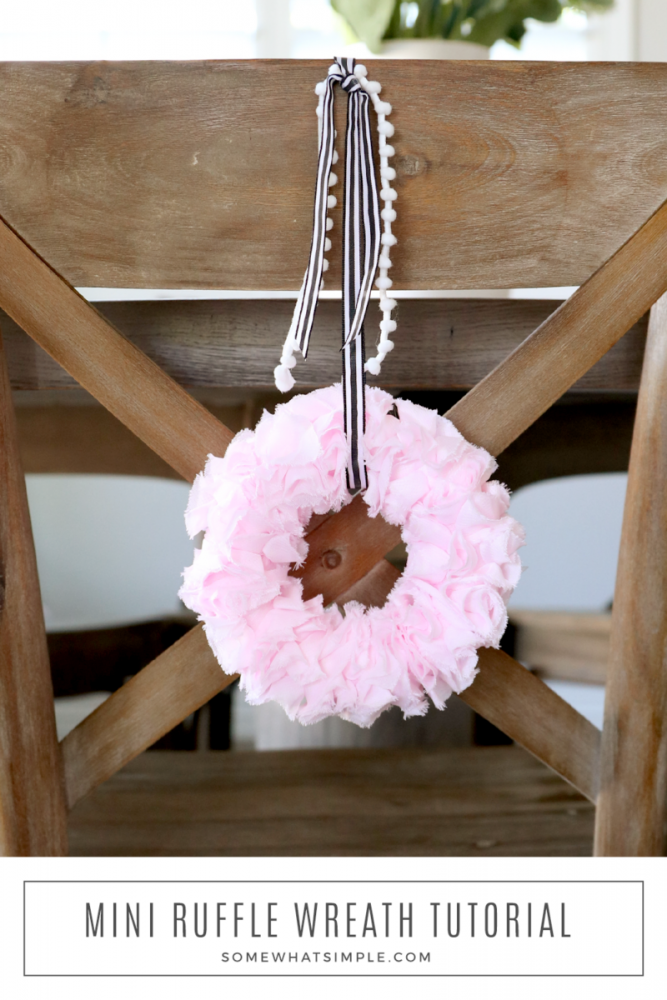
This ruffle wreath is easy to make and perfectly customizable. Make one for any holiday, season, or celebration in just a few minutes!
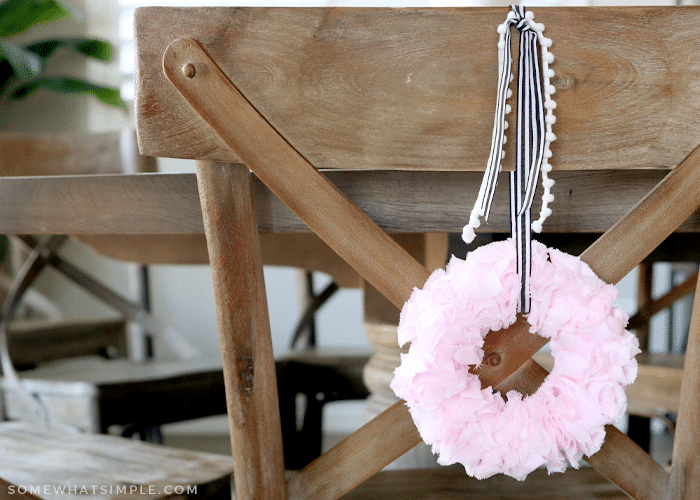
Sometimes I get an idea in my head, and when I actually make it, it looks nothing like I had hoped – does that ever happen to you? This was not the case with this mini ruffle wreath! It turned out just like I envisioned and I absolutely LOVE it!
The inspiration for this wreath came from a couple Ruffled Ribbon Topiaries that I made YEARS ago! They stood on my mantle one year for Valentine’s Day and while definitely outdated nowadays, at the time they were adorable!
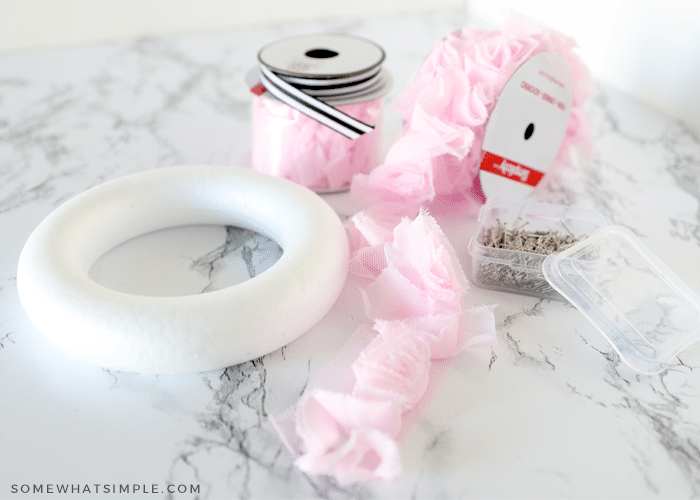
This darling mini wreath just might be one of my favorite DIY projects ever! It is so simple to create, and it’s affordable, too! I bought the wreath form on Amazon and the ribbon from Walmart. The rest of the materials were from my sewing stash. So easy, right?
Here is how to make it –
Mini Ruffle Wreath
MATERIALS –
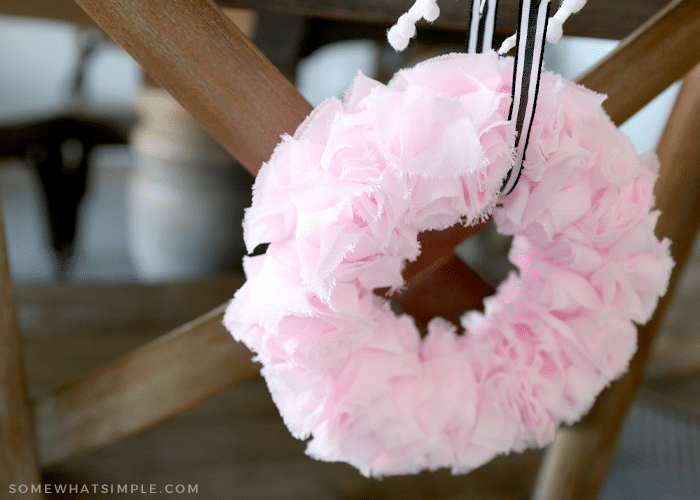
- 2 yards of ruffled ribbon – you can make this yourself, or buy premade spools. I used this Chiffon Rose Trim that looks ruffly when scrunched together.
- straight pins
- 5″ styrofoam wreath form
- ribbon, to hang the wreath
DIRECTIONS –
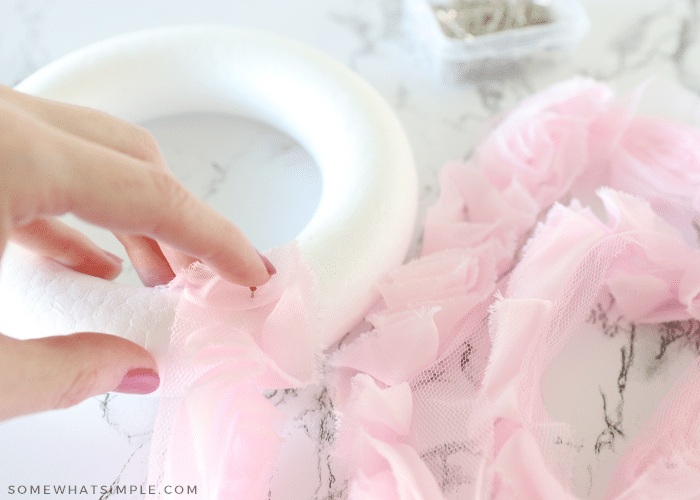
- Wrap your ribbon once around the wreath form and secure it tightly by sticking a straight pin down through the ribbon and into the styrofoam. Hide the pin by ensuring you place it really close to or under a ruffle.
- Continue wrapping the ribbon until the whole wreath is covered, pushing the pins in random spots to secure it, as needed.
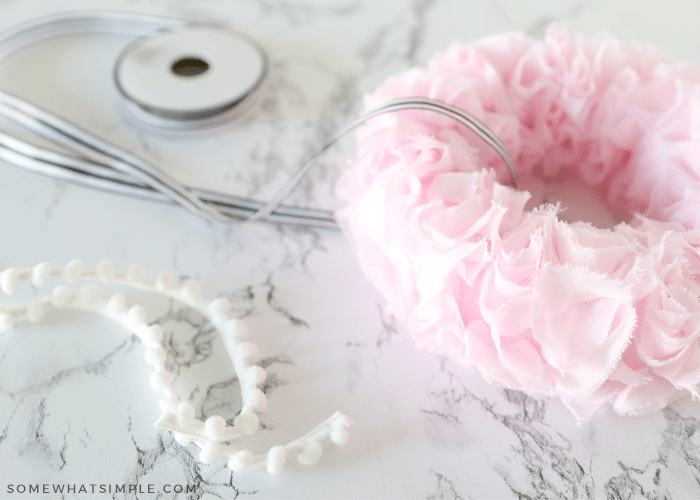
3. Loop some ribbon through the wreath, just long enough to hang it.
…and you’re done!
I love easy projects that turn out even cuter than I imagine! Isn’t this ruffle wreath so fun? (I think I need one for every holiday!) 😉
I love this idea. Thanks for a great tutorial.
this is really cute!!
ADORABLE! i love those! and would love to see how a wreath would turn out…
I love this! My mind is racing with different ideas of how I could use these techniques.
This is really CUTE!! I love how elegant it looks!
So sweet, i was looking at a similar idea the other day using cupcake wrappers 🙂
These are so amazingly adorable!
They are ridiculously cute!! I am definitely going to give these a go – brilliant, thanks for sharing!
Thank You for your creativity!! This is adorable and could stay up all thru Spring too!!!!
Thanks for saying where you bought everything.
How cute is that?! Love it!
Very, very pretty Ü Looks soooo daity. ♥ the color and the ruffles are the neatest idea.
So Cute!
I love this! Going to have bunco at my house and this would be a cute little table decoration to make. Thanks!
they are very cute, great idea, I have to make this for my home, thank you for sharing!
oooh, this is so pretty!!
That is such a great idea! It's so pretty!
cute cute cute!!! 🙂
This is such a sweet idea and a very nice tutorial. I will link it on my blog, so I don't forget to make a few. ~Kelly
unDeniably Domestic
Oh my! I'm gonna have to copy you on this one! These are sooo pretty!
how cute these are completely adorable!
Veronica
5Star Digital Scrapbooking
It looks absolutely gorgeous! Great work.
wow the elastic really makes PERFECT ruffles! Great tutorial!
Oh my! Absolutely adorable! Great job 🙂 I can't wait to try this.
Thanks for posting this well done tutorial – These are so cute ! I just love them !
These are so cute and adorable. These can be used for all kinds of applications in decor and I appreciate you sharing.
I love these and have always wondered how to make them, thanks!
This is awesome! I wonder if I could use a ruffler foot for the sewing machine instead of elastic. I might try that – love the idea!
Way fun! Way awesome! Way cute! Love it!
Your wreath turned out great. I love the choice of fabric!
These wreaths are just adorable! Thanks for sharing your inspiration!
That is so cool!!!! I love the elastic ruffle, I could totally do that…I'm not a great sewer…and I've tried the ruffle with regular thread and it didn't really work like I wanted it to…these turned out beautiful!
Seriously, I have a feeling my home will become filled with these! I adore ruffles and this is absolutely the best idea!!!!!! Lori
OMG!! Just too stinkin' cute! You need a ruffler foot! It is AMAZING!
These are adorable-what a creative idea-love them! Found you on the blog hop and now I'm a follower-come by and visit sometime! -Claire
I loved your idea so much, I featured it at Sassy Sites! Happy Saturday! xoxo!!
These are CUTE!! I might actually be able to figure out how to make these…I'm not good at sewing at all; but I think I can manage to sew in a straight line using a zig zag stitch TFS!!
Great idea! You've been featured at today's Craftastic Monday!
how wide is the satin ribbon and is it single side or double sided satin.. Such and adorable idea thanks so much for sharing..
Peppermint~
Thanks! The ribbon is 1.5" wide and only single sided satin.